Font Assets
TextMesh Pro has its own Font asset format. When you add a font – typically a TTF file – to a Unity project, Unity will import it as a font asset. You then have to use the font asset creator to generate a TextMesh Pro font asset from it. Afterwards, you no longer need the original TTF asset. However, it is a good idea to keep it in your project, in case you need to recreate the font asset.
Font Asset Creator
The TextMesh Pro font creation window can be opened in the editor via Window / TextMeshPro - Font Asset Creator. The window presents you with a few font settings, a generate button, a texture preview, and a button to save your new font asset.

By default, the window is configured to create a signed distance field (SDF) font asset. The generated textures for these fonts contain contour distance information, which looks like grayscale gradients. When rendered with the right shaders, this will produce high-quality text with support for effects like outlines and drop shadows.
When saving font assets, you have to put them in a specific folder, defined in the settings asset. This will ensure that TextMesh Pro can find them and that they are included in builds.
Font Source
You must select a font from which to generate a Text Mesh Pro font asset. The font source is only needed to generate the font asset. It won't be included in builds, unless you also use it elsewhere or put it in a Resources folder. The Text Mesh Pro package includes ARIAL, Bangers, and IMPACT as example font sources.
Font Size
You can control the font's point size that will be used to generate the font's texture. You can either manually set a custom size or use automatic sizing. Auto Sizing will try to use the largest point size possible while still fitting all characters on the texture. You typically use Auto Sizing for SDF fonts and Custom Size when you want pixel-accurate control over bitmap-only fonts.


Font Padding
Characters in the font texture need some padding between them so they can be rendered separately. This padding is specified in pixels.
Padding also creates room for the SDF gradient. The larger the padding, the smoother the transition, which allows for higher-quality rendering and larger effects, like thick outlines. A padding of 5 is often fine for a 512x512 texture.
Packing Method
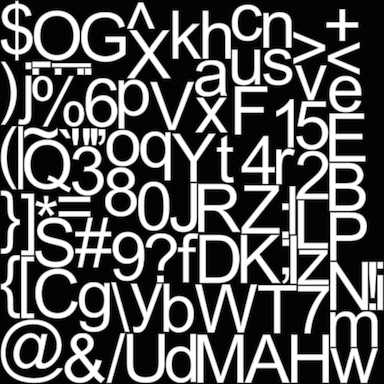
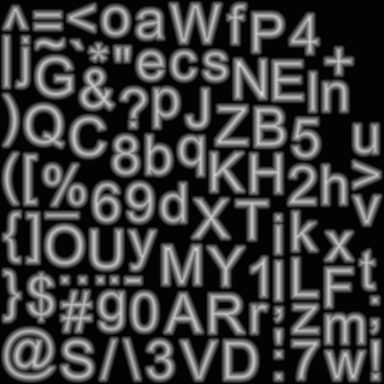
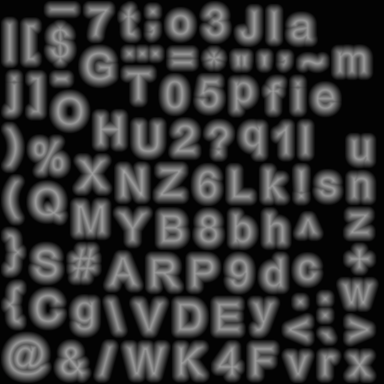
Optimum packing will find the largest possible automatic font size that still fits all characters in the texture. Fast packing is a bit faster but might end up using a smaller font size. Typically, you use fast when trying out settings and optimum for the final result.
Atlas Resolution
When using an SFD font, a higher resolution results in finer gradients, which produces higher quality text. For most fonts, a 512x512 texture resolution is fine when including all ASCII characters.
When you need to support thousands of character, you will have to use large textures. But even at maximum resolution, you might not be able to fit everything. In that case, you can split the characters by creating multiple font assets. Put the most often used characters in a main font asset, and the others in a fallback font assets.
Character Set
The characters from a font file aren't automatically included in the font asset. You have to specify which ones you need. You can select a few predefined character sets, or provide a list of characters yourself.
The presets include the visible characters of the ASCII and Extended ASCII character sets. You can also choose common subsets of ASCII, limited to lowercase, uppercase, and only the numbers and symbols.
The other options give you complete control over which characters to include. You can specify character ranges, using either decimal of hexadecimal numbers. Or you can explicitly list each character.


You can also use a text asset, which should contain all the characters that you want included in your font. This allows you to save your character set.

Be sure to include the space character, unless you really don't need it.
Font Style
You can choose between a few different font styles. These settings are for bitmap-only fonts. You can configure the styles of SDF fonts via shaders instead. You can choose between bold, italic, bold plus italic, and outline. You can control the strengh of the boldness and the outline.
Font Render Mode
The distance field modes create SDF textures for use with SDF shaders. The characters are sampled at high resolutions to create good gradients. 16x is the default and adequate for typical use. 32x is slower to generate but can produce better quality for complex or small characters.
The other modes directly render characters to bitmaps for use with bitmap-only fonts. Raster mode doesn't use anti-aliasing while smooth mode does. Both have a variant mode with hinting, which aligns character pixels with texture pixels for a crisper result.
Get Kerning Pairs?
You can choose to copy the kerning data from the font. This data is used to adjust the spacing between specific character pairs, to produce a more visually pleasing result. Note that many fonts do not have kerning pairs.
Font Asset
TextMesh Pro font assets contain all the information that TextMesh Pro needs to layout and render text.

Face Info
Face info contains information about the font asset. You can see the name of the original font, the point size and padding used to generate the asset, and the size of the atlas texture. These values cannot be edited.
Then there are some metrics that are extracted from the font, which you can adjust to fine-tune the font or to correct weird values. Sometimes fonts are designed with strange metrics which you'll have to tweak to make it usable.

The basline is the horizontal line on which characters sit. The ascender describes how far above the baseline characters can extend, which also defines the top of a line. The descender does the same, but below the baseline. The line height defines the distance between the tops of consecutive lines. If it is larger than the size of the ascender and descender combined, there will be a gap between lines. If it is smaller, then characters from different lines could overlap.
Underline dictates where underlines will be placed, relative to the baseline.
The superscript and subscript offsets are used to adjust the baseline for superscript and subscript text. Their size is a factor that is used to scale such text, relative to the normal font size.
Font Sub-Assets
Each font asset also contains two sub-assets. These are its texture atlas and its default material. You should not edit these directly.
Font Weights
You can control how bold and italic changes the appearance of the font. It is possible to select different font assets to be used for bold, italic, and bold with italic font variants. If you do not specify font variants, fake bold and italics will be used instead.

You can also adjust the weight and spacing of the text. The weight is added to the dilation used by the SDF shaders. The spacing is added to the space between characters. You can define these values for both the normal and fake bold style.
The Italic Style is used to create a fake italic font variant by slanting the character sprites. You can control the strength of this effect.
Tab Multiple controls the tab size. It is defined as a multiple of the width of the font's space character.
Fallback Font Assets
Each font asset contains a limited amount of characters. Sometimes, a font that you're using lacks a character that you need. When that happens, the fallback font list will be searched until a font is founds that does include the missing character. The text object will then use that font to render it.

You can also use this feature to distribute fonts over multiple textures. Or to automatically use different fonts for certain characters. However, keep in mind that searching the list for missing characters requires extra work. Also, additional fonts require additional draw calls.
Glyph Info
Here you can inspect the data of each character in the font, and tweak it if necessary. The character list is split into pages, which you can navigate through via the buttons at the top and bottom. You can also filter the list, based on character codes. Click on an entry to make it active. This allows you to edit, copy, and remove it.

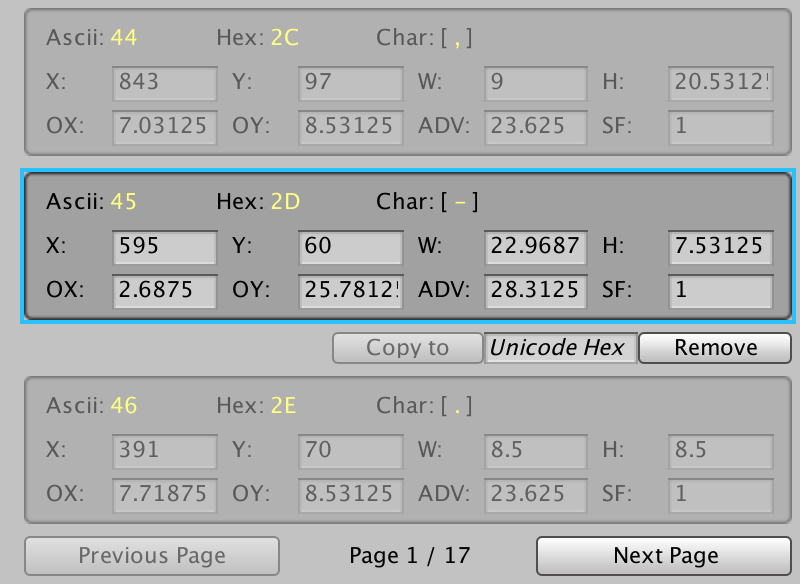
The X, Y, W, and H values define character's rectangular area in the font atlas. The OX and OY offsets control the placement of the character's sprite, defined at its top-left corner relative to its origin on the baseline. The ADV value controls how far to advance along the baseline before placing the next character. Finally, SF is a scale factor which you can use to ajust the size of the character.
Kerning Table Info
The kerning table is either imported from a font or made manually. The table is split into pages, which you can navigate through via the buttons at the bottom. Each entry is a kerning pair with a left and a right character. The offset is relative to where the right character would normally start. A positive value pushes the characters further apart, while a negative value pulls them together.
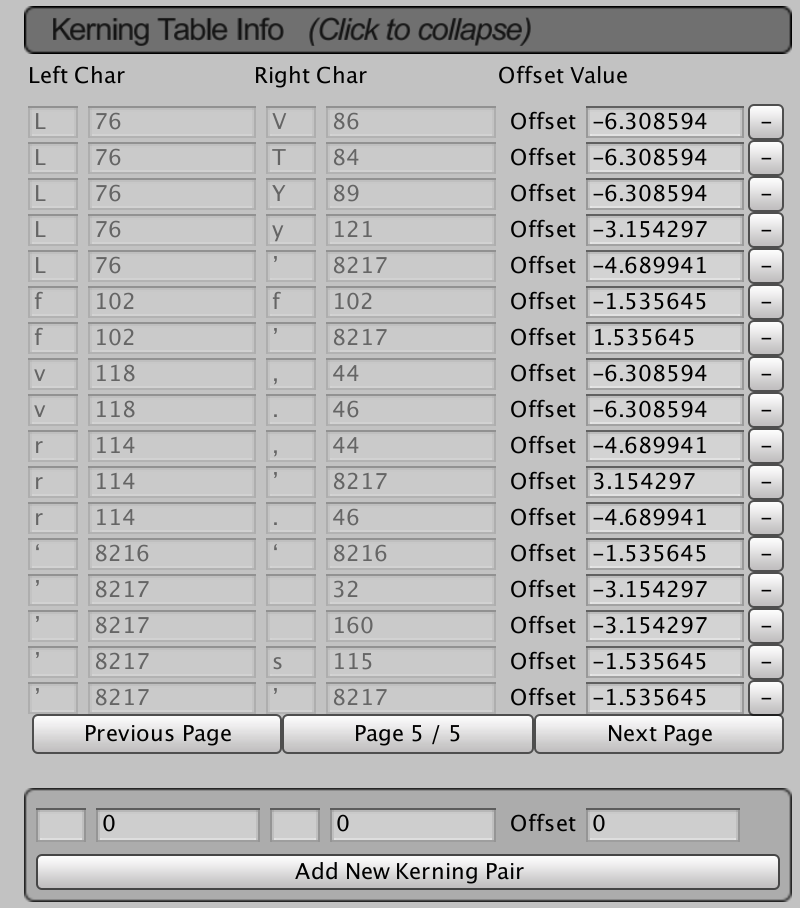
There are many fonts that do not include kerning pairs. You can add them manually, by specifying either the characters or their decimal character codes, plus their offset adjustment.