Text Objects
TextMesh Pro supports two kinds of text objects. One is for Unity's UI, and the other is for placement in a 3D scene. Their functionality is largely the same, but there are a few essential differences. This page will use the UI object to describe TextMesh Pro's functionality, and point out any differences of the 3D object.
Text Objects
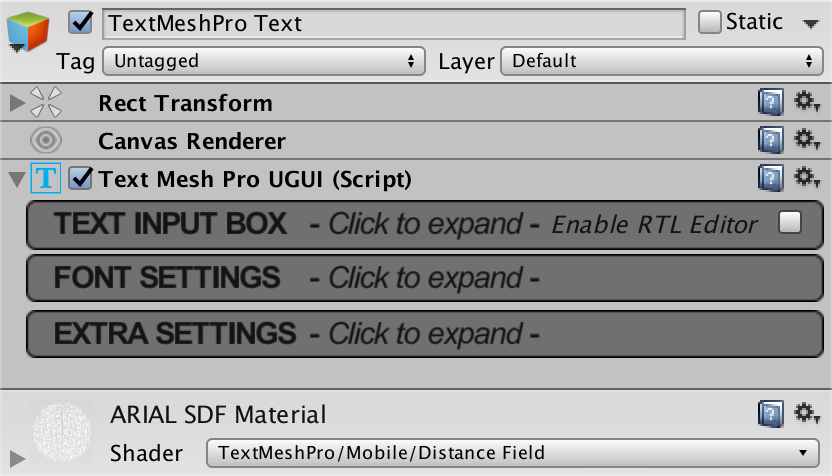
You can create a UI text object via GameObject / UI / TextMeshPro - Text. Like all of Unity's visible UI objects, the new object has a Rect Transform and a Canvas Renderer component. Its text is managed by a Text Mesh Pro UGUI component. UGUI stands for Unity GUI. You can also create a text object by adding this component to a new game object. It will add the other required attributes automatically.
UI Material
Note that the object's inspector also displays the material that is used to render the text. Normally, UI objects do not display their materials in this way, because they do not have a Mesh Renderer component. In this case, it is actually part of the UGUI component's inspector. If you were to add more components to the object, they will be displayed below the material, unless you change their order.
This material inspector provides convenient access to the text's material. Unfortunately, it does not allow the UI object's material properties to be animated. This is a limitation of Unity's UI solutions.
3D Text Object
3D objects are created via GameObject / 3D Object / TextMeshPro - Text. The text itself is flat, just like UI text, but it exists separately in the 3D scene, instead of inside a canvas.
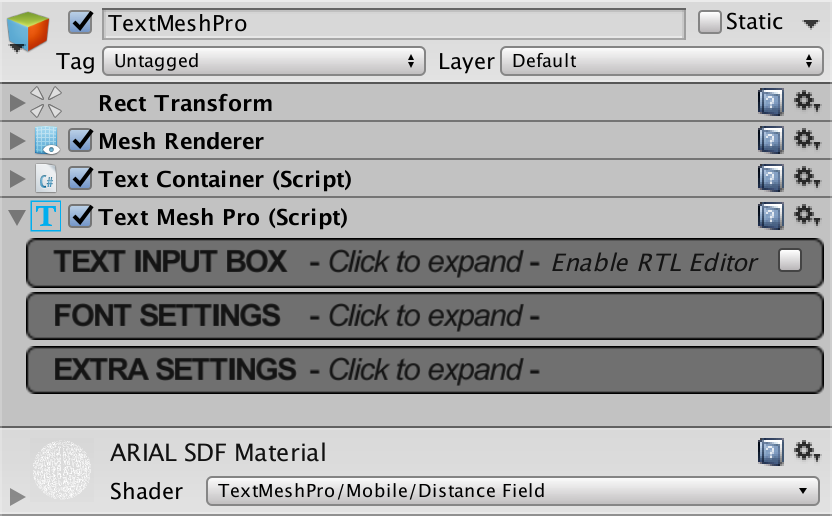
In this case, the object has its own Mesh Renderer component. It has a proper material inspector as well, and its material properties can be animated.
3D objects do not have a Canvas Renderer. Instead, they have a Text Container, which is responsible for the layout of the text area, together with the Rect Transform component. Even though these are 3D objects, they still use the alternative rectangular transform component.
Text Input Box
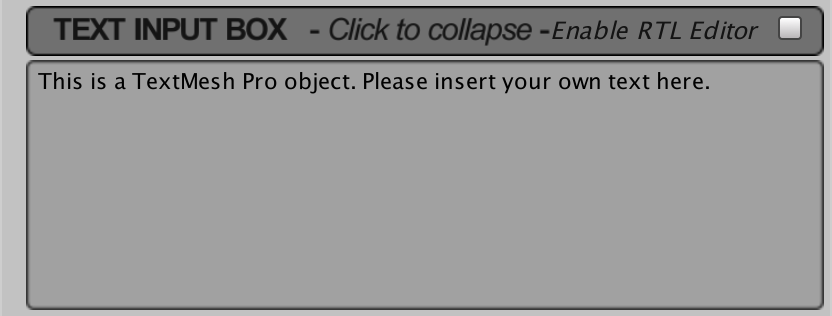
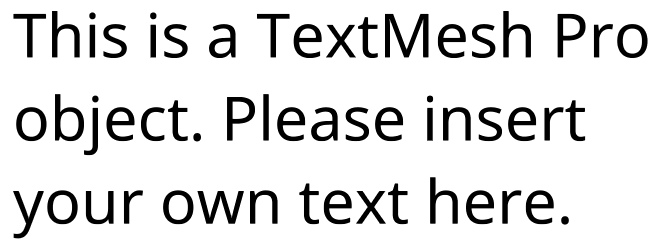
The text input box is where you can insert the text to be displayed. This is the text that will be shown by default.
Right-to-left Mode
You can use the Enable RTL Editor toggle to switch to right-to-left text. In this mode, the text input will be reversed before it is displayed. The inspector will also show an additional input field where you can directly edit the reversed text.
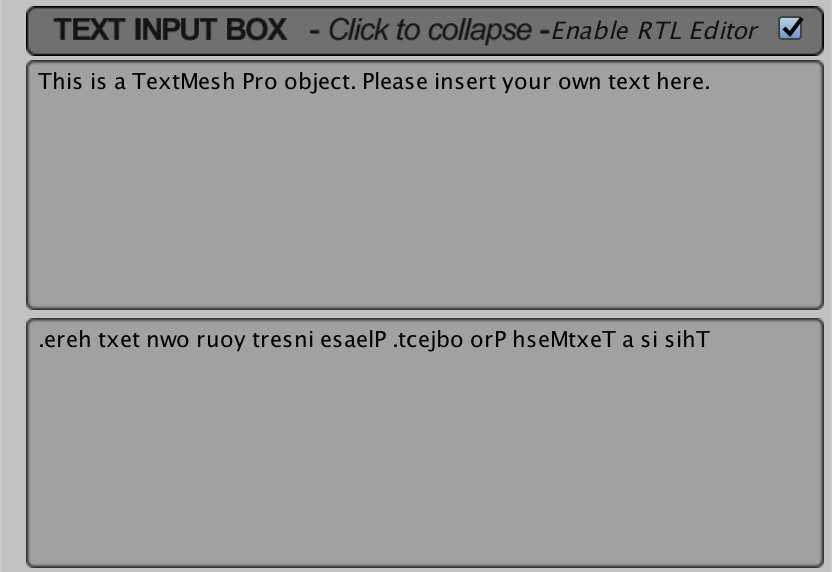
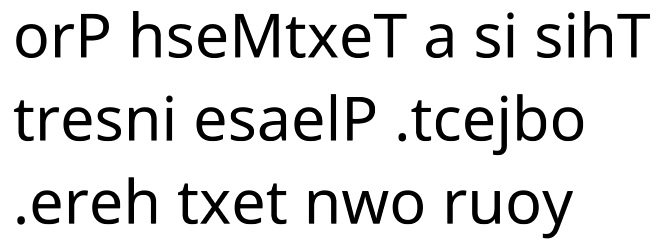
RTL mode only reverses the text, everything else stays the same. For example, you have to explicity switch to right alignment mode if that's what you need. It also doesn't perform character substitution, which is needed for Arabic text. See this forum topic for more info about this.
Font Settings
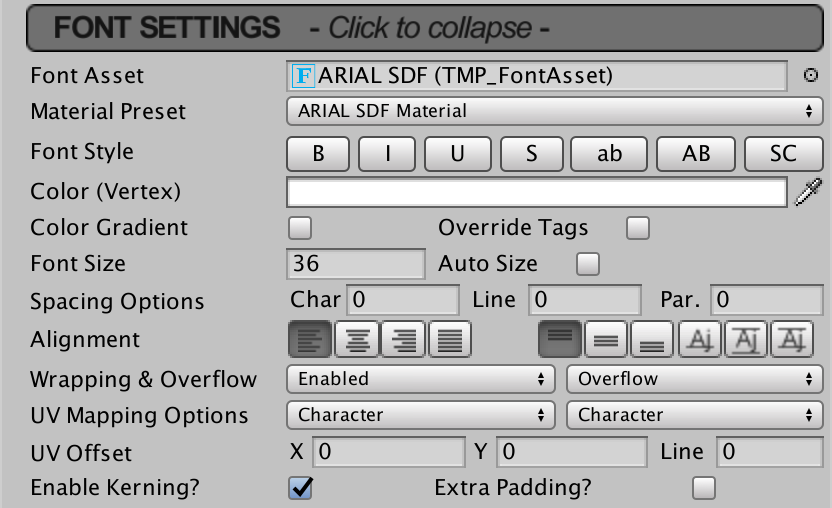
The fonts settings panel is where you select a font and customize its style. It also contols text alignment and a few other settings.
Font Asset
TextMesh Pro uses its own font asset, which you can create via the Font Asset Creator window. By default, the included Arial SDF asset is used.
Material Preset
Each font asset has a default material, but you can also create customized materials for it. You can use this dropdown to quickly select a material variant.
The preset list is populated by searching for all materials that contain the font asset's name in their own name, and use the matching font atlas texture.
Font Style
There are seven font style toggle buttons that you can use to adjust appearance of the entire text. If you want to style a portion of the text differently, you can use rich text tags.
The first two buttons are for bold and italics font variants. Their appearance depends on the font asset.
The next two buttons enable underline and strikethrough. These add horizontal lines on top of the text, either below or above the baseline.
The last three buttons change the capitalization of the text. Lowercase mode converts uppercase characters to their lowercase equivalent before rendering. Uppercase mode works the other way around. Small caps mode does the same as uppercase, and also reduces the size off all characters that weren't originally uppercase. These three styles are mutually exclusive.
Color
Vertex colors are used to tint the text. Besides using a uniform color, you can also enable a gradient. When using a color gradient, you can give the four corners of all character sprites a different color. You can either configure these per text object, or use a gradient preset.

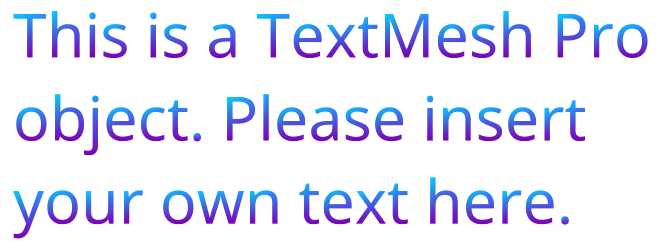
The gradient colors are multiplied with the uniform vertex color. To see the original gradient, use a white uniform color.
When override tags is enabled, rich text colors will be ignored.
Font Size
The font size determines the display size of the characters. You can either use a fixed size or automatic sizing.
When auto size is enabled, you can specify a minimum and maximum size. TextMesh Pro will figure out which size to use, by performing layout multiple times until it finds the best fit. The final font size is shown in the font size input field.

The WD% field contains a percentage which controls the maximum character width reduction. This allows characters to be horizontally squeezed to make them taller. This is usually only acceptable for digits.
You can also allow the line height to be reduced in order to fit a larger font size. You can control this via the Line field.
When auto size is enabled, the text is layout multiple times to find a good fit. So only enable it when needed, and avoid it for dynamic text that changes frequently. If your text doesn't change, you can enable auto size to find the best fit, then disable it and manually use the calculated font size.
Spacing Options
Spacing between characters, lines and, paragraphs can be both increased and decreased. Paragraphs are defined by explicit line breaks. You can use these settings to fine-tune the text per object, without adjusting the font asset.
These settings can also be varied inside a single text object, by using rich text tags.
Alignment
There are ten text alignment modes, split in two groups. The modes are exclusive per group.
Horizontal
There are four horizontal aligment modes to choose from. The left, center, and right modes control the placement of lines on text inside the display area. These modes don't change the contents of the lines, only their horizontal positions.


The justify alignment mode instead stretches lines so they fill the entire width of the display area. This is done by increasing the distance between words and between characters inside words. The Wrap Mix slider controls the ratio of extra word spacing versus extra character spacing.

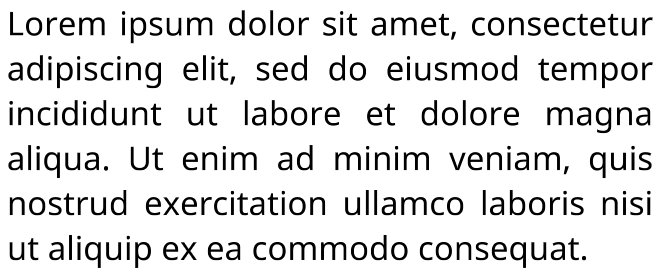
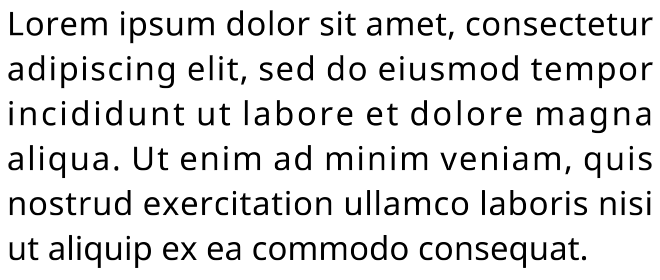

Only lines that are wrapped will be stretched. All other lines – those with line breaks or at the end of the text – will be left-aligned.
Vertical
There are also six vertical alignment modes. The top, middle, and bottom modes work like the first three horizontal alignment modes, but vertically.
The fourth mode is baseline alignment. It positions the contents so the baseline of the first line of text is aligned with the middle of the display area. This can be useful when working with a single line of text.
This fifth mode is midline alignment. It behaves like the middle vertical alignment, but it uses the bounds of the text mesh to determine vertical placement, instead of the line metrics. This is useful in tight spaces when ascenders and descenders would otherwise extend too far.
The last mode is capline alignment. It is like baseline alignment, but it uses the middle of the first line, instead of the baseline.
Wrapping & Overflow
When word wrapping is enabled, text lines are split to make sure that they don't get wider than the display area. Lines are normally wrapped at word boundaries, but words that are longer than an entire line will be split as well.
The overflow mode controls what happens when the text doesn't fit inside the display area. Overflow means that the text will extend beyond the bounds of the display area, althrough it will still be wrapped. Ellipsis will cut off the text and insert "…" to indicate that some of the text is omitted. Truncate simply cuts off the text when it no longer fits.
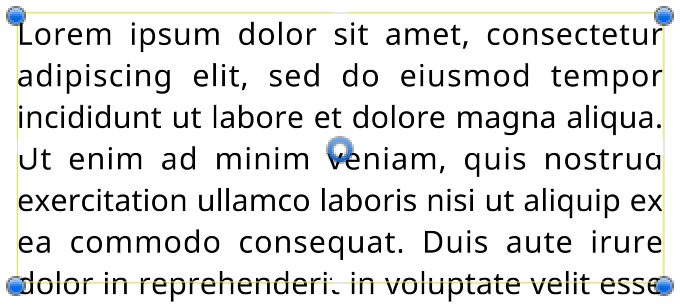

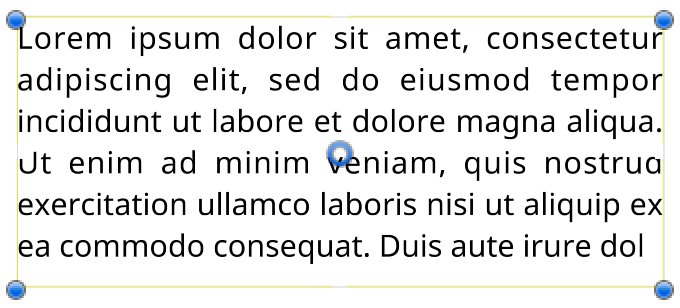
Page mode will cut the text into several pages that individually fit inside the display area. You can then choose which page to display. As pages are displayed separately, vertical alignment works on a per-page basis. You can also use rich text to manually insert page breaks.

Masking will render the text just like overflow, but everything outside of the display area will be hidden by the shader. This only works for UI objects, not for 3D objects. Scroll Rect serves a similar purpose but is deprecated.
UV Mapping
You can use a shader with support for additional textures to map images on top of the text. The UV mapping options control how textures are stretched across the text. You can use different settings per dimension. The left option is for the X dimension, the right option is for the Y dimension.
The wrap mode of the texture should be set to repeat, otherwise it will be displayed incorrectly.
Character stretches the texture across each character's sprite. So each character shows the same image, stretched according to its own aspect ratio.
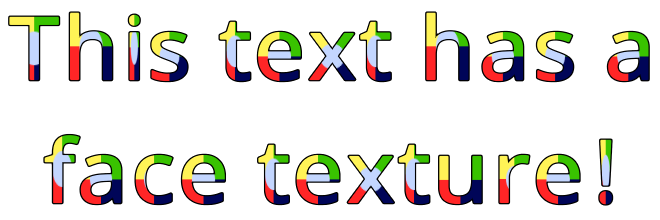
Line stretches the texture across the entire width or height of each line.

Paragraph stretches the texture across the entire text.
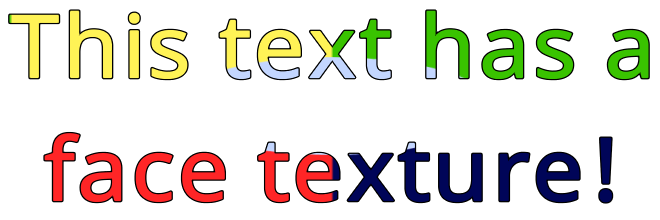
Match Aspect ensures that the texture is scaled in one dimension to it maintains its original aspect ratio. This ensures that the texture will not be deformed. How the texture is mapped onto the text is controlled by the other dimension, so you cannot set both to match aspect.

The UV offset can be used to adjust the relative position of the texture in both the X and Y dimensions. As these offsets are added to the texture coordinates, to visually move the texture in a positive direction you'll have to apply a negative offset.
There is also a line offset, which is added to the X offset for each successive line, when using Line or Paragraph mapping. You can use this for slanted texturing.

Kerning and Padding
Enable kerning controls whether the kerning data of the font will be used. This has no effect for fonts without kerning data.
Extra padding maximizes the size of sprites used to render the character. The geometry is created to fit the visible text, but this isn't always perfect. Add extra padding to the sprites to prevent glyphs from being cut off at the boundaries of their sprite.
Extra Settings
The Extra Settings sections contains a few miscellaneous configuration options.

The Margins values can be used to add some space between the text and the content bounds. You can also use negative margins, in which case the text can extend beyond the bounds of the container. You can also adjust the margins by dragging the handles of the yellow rectangle in the scene view.

Rich text is enabled by default, but you can disable it if you wish. When disabled, tags are not parsed and will be shown as plain text.
You can also toggle whether the text is a raycast target. When disabled, the UI ignores the text when determining what the cursor interacts with.
When Parse Escape Characters is enabled, backslash-escaped characters are interpreted as special characters. So \n is interpreted as a newline, \t as a tab, and so on. Note that this applies to the actual text, like user input. In code, escaped characters are already parsed by the compiler.
It is possible to limit how many character of the text are visible, via scripting. This can be used to slowly reveal the text. Use Visible Descender controls how this works in combination with the bottom vertical alignment. When it is enabled, the text is revealed at the bottom and gets pushed up as more lines are releaved. When it is disabled, the text is revealed from top to bottom.
3D Text Object
There are a few differences for 3D text objects. It doesn't include the margins and raycast-target settings.

The Sorting Layer and Order settings can be used to fine-tune the order in which the objects are rendered.
Orthographic mode should be enabled when using camera-aligned text with an orthographic camera. It instructs the shader to not use any perspective correction.
By default, quads are used to display characters. Enabled Volumetric Setup activates an alternative mode, in which cubes are used instead. This allows for volumetric character rendering, but there currently is no shader support for this feature.
Text Container
The UI text object uses the UI canvas system to determine its position and size. This is controlled via the RectTransform component. While the 3D text object also has a RectTransform, it doesn't have access to the canvas layout system. Instead, it has its own container component.

The Anchor Position and Dimensions settings mimic the functionality otherwise provided by the canvas system.
The Margins values are found here as well, instead of under Extra Settings of the text component.